java.lang.IllegalStateException in com.quinny898.library.persistentsearch.SearchBox$SearchAdapter

I can finally figure out what happen.

I am using “com.quinny898.library.persistentsearch:library:1.1.0-SNAPSHOT”.

When I try to do “notifyDataSetChanged();” in another ListViewAdapter, this error message shows up.

Error Message:

java.lang.IllegalStateException: The content of the adapter has changed but ListView did not receive a notification. Make sure the content of your adapter is not modified from a background thread, but only from the UI thread. Make sure your adapter calls notifyDataSetChanged() when its content changes. [in ListView(2131690277, class android.widget.ListView) with Adapter(class com.quinny898.library.persistentsearch.SearchBox$SearchAdapter)] : at android.widget.ListView.layoutChildren(ListView.java:1597)

Solution!

You Should call closeSearch() when search box is closed;

@Override
public void onSearch(String searchTerm) {

    closeSearch();//Important!
}

@Override
public void onResultClick(SearchResult result) {
    //React to result being clicked
    closeSearch();//Important!
}

@Override
public void onSearchCleared() {

}
protected void closeSearch() {
    search.hideCircularly(MainActivity.this);
    search.clearResults();
}

ActivityとFragmentとChildFragmentの連動

ややこしいからメモ

Activity→Fragment→ChildFragmentのViewPagerである特定のViewPagerのpositionを呼び出したいとき

try {
   FragmentManager fm = ((MainActivity) context).getSupportFragmentManager();

   Fragment prev = fm.findFragmentByTag("たぐ");
   if (prev != null) {

      FragmentManager fmF =prev.getChildFragmentManager();
      ChildClass fragInFrag = (ChildClass)fmF.findFragmentByTag(
            "android:switcher:" + R.id.pager + ":1(ここはPositionを指定)");
      if (fragInFrag!= null){
         fragInFrag.なんかの動作();
      }

   }


} catch (ClassCastException e) {
   Log.e("TAG", "Can't get fragment manager");
}

ActivityからFragmentのフラグメントの動作を呼び出したいとき

//親fragmentの呼び出し
Fragment prev = getParentFragment().getFragmentManager().findFragmentByTag("たぐ");
if (prev != null) {
Class df = (Class) prev;
    df.なんかの動作();
 }

FragmentまたはChildFragmentからActivityを呼び出したいとき

MainActivity activity = (MainActivity) getActivity();
if(activity!=null)activity.なんか();

FragmentまたはChildFragmentからFragmentを呼び出したいとき

 try{
 FragmentManager fm = getActivity().getSupportFragmentManager();
 Fragment_class main = (Fragment_class)fm.findFragmentById(R.id.container);
 if (main != null){
 main.なんか
 }
 }catch(ClassCastException e){
 }


JPGのExifのorientationを削除する方法

マジで情報がなかった。

PHPの実装されたExif情報を操作するライブラリ「PEL」を使うやり方


もしコメントを入れたいなら↓で出来る

<?php
require_once(‘pel-0.9.1/PelJpeg.php’);

$filename = “DSC_3297.JPG”;
$jpeg = new PelJpeg($filename);
$app1 = $jpeg->getExif();

if ($app1) {
$tiff = $app1->getTiff();
$ifd0 = $tiff->getIfd();

if ($ifd0) {
$exif = $ifd0->getSubIfd(PelIfd::EXIF);
$text = “コメントです”;
$entry = $exif->getEntry(PelTag::USER_COMMENT);
if (!$entry) {
$entry = new PelEntryUserComment(mb_convert_encoding($text, “JIS”,
“auto”), “JIS”);
$exif->addEntry($entry);
} else {
$entry->setValue(mb_convert_encoding($text, “JIS”, “auto”), “JIS”);
}
file_put_contents($filename, $jpeg->getBytes());
}
}

しかしJPGの方向(orientation)を変えるのはどうしたらいいのだろうか

答え↓

$img_toPel = new PelJpeg ( $img_to );
$app1 = $img_toPel->getExif();

if ($app1) {
$tiff = $app1->getTiff();
$ifd0 = $tiff->getIfd();
$entry = $ifd0->getEntry(PelTag::ORIENTATION); // Orientation
echo $entry->getValue();
if (!$entry) {
$entry = new PelEntryShort( PelTag::ORIENTATION,1 );
$exif->addEntry($entry);
} else {
$entry->setValue(1);
}
file_put_contents ( $img_to, $img_toPel->getBytes () );
}

もしいろんな情報のExifを変えたい場合は

/pel/src/PelTag.php

のFormat: にそれぞれに適したフォーマット(PelTag::ORIENTATIONだったらPelEntryShort)が書いてる

書き方わかんない場合は

\pel\test\image-tests

を見たら一番早いそれぞれのGPS情報とかいろいろのサンプル書いてる


Androidのspinnerで同じ項目を選択したときにonItemSelectedが呼び出されない件

なんか仕様で呼び出されない

解決方法はカスタムspinnerを作る事!

package com.test;

import android.content.Context;
import android.util.AttributeSet;
import android.widget.Spinner;

public class CustomSpinner extends Spinner {

   public CustomSpinner(Context context)
   { super(context); }

   public CustomSpinner(Context context, AttributeSet attrs)
   { super(context, attrs); }

   public CustomSpinner(Context context, AttributeSet attrs, int defStyle)
   { super(context, attrs, defStyle); }

   @Override public void
   setSelection(int position, boolean animate)
   {
      boolean sameSelected = position == getSelectedItemPosition();
      super.setSelection(position, animate);
      if (sameSelected) {
         // Spinner does not call the OnItemSelectedListener if the same item is selected, so do it manually now
         getOnItemSelectedListener().onItemSelected(this, getSelectedView(), position, getSelectedItemId());
      }
   }

   @Override public void
   setSelection(int position)
   {
      boolean sameSelected = position == getSelectedItemPosition();
      super.setSelection(position);
      if (sameSelected) {
         // Spinner does not call the OnItemSelectedListener if the same item is selected, so do it manually now
         getOnItemSelectedListener().onItemSelected(this, getSelectedView(), position, getSelectedItemId());
      }
   }
}

のCustomSpinnerクラスを作成

MainActivityで

CustomSpinner customSpinner;

を作って(インポートしてね!)

XMLは

<com.test.CustomSpinner
    android:layout_width="match_parent"
    android:layout_height="wrap_content"
    android:id="@+id/customSpinner"
    android:layout_weight="1" />

customSpinner= (CustomSpinner) layout.findViewById(R.id.customSpinner);

ってすれば普段通りの

customSpinner.setAdapter(adapter);
customSpinner.setOnItemSelectedListener(new AdapterView.OnItemSelectedListener() {

    @Override
    public void onItemSelected(AdapterView<?> parent, View view,
                               final int position, long id) {
        if(powarOn) {
            powarOn = false ;
            return ;
        }
       //動作すること
    }

    @Override
    public void onNothingSelected(AdapterView<?> arg0) {

    }
});

で同じもの選択されたときにonItemSelectedが流れます


projectにmoduleを追加するときは気を付けよう!

世の中には便利なライブラリがたくさんあるけどたまにバグってる時もある。

そんなときは自分でプロジェクトにモジュールを追加して、んで

dependencies {
    compile project(':library')

を追加させると自分で編集できるライブラリになる

でも何も考えずfileのnewよりimport Moduleをしてlibraryを追加させるとGradleさんがなんか動いてくれない、てか新しく追加もされていないし、なんかプロジェクトめちゃくちゃになった。

とりあえずライブラリのあったフォルダを直接削除して、

gradleを更新かけると追加したフォルダが出てくれたので

fileのproject structureから追加したモジュール名選択して、「-」記号をクリックして削除して、もう一度gradle更新したらなんとか治った。

皆さんもモジュールとか追加するときはバックアップしましょう


TableLayoutでTextViewを文字サイズによって調整する

サイズを指定して表示させとけばそのサイズになるけどきちんとサイズを自動的に調整させると意外とハマった

<TableLayout
    android:id="@+id/shelfTableLayout"
    android:layout_width="match_parent"
    android:layout_height="wrap_content" >
</TableLayout>
<?xml version="1.0" encoding="utf-8"?>
<RelativeLayout xmlns:android="http://schemas.android.com/apk/res/android"
    xmlns:app="http://schemas.android.com/apk/res-auto"
    android:orientation="vertical"
    android:layout_width="match_parent"
    android:layout_height="match_parent"
    android:id="@+id/viewID"
    >

    <RelativeLayout
        android:orientation="horizontal"
        android:layout_width="match_parent"
        android:layout_height="match_parent"
        android:padding="5dp"
        android:id="@+id/ShelfSectionLinearLayout">

        <ImageView
            android:id="@+id/listImg"
            android:layout_width="80dip"
            android:layout_height="50dip"
            android:layout_weight="0"
            android:layout_gravity="center"
            android:layout_centerInParent="true"
            android:layout_alignParentLeft="true"
            android:src="@drawable/plusc"

            />

        <LinearLayout
            android:id="@+id/ShelfSectionTextLinearLayout"
            android:orientation="vertical"
            android:layout_toRightOf="@+id/listImg"
            android:layout_width="match_parent"
            android:layout_height="match_parent">
            <TextView
                android:id="@+id/ShelfSectionText"
                android:layout_width="wrap_content"
                android:layout_height="wrap_content"
                android:text=""
                android:textAppearance="?android:attr/textAppearanceMedium"
                android:layout_weight="0"/>

            <TextView
                android:id="@+id/ShelfSectionText2"
                android:layout_width="wrap_content"
                android:layout_height="wrap_content"
                android:textAppearance="?android:attr/textAppearanceSmall"
                android:text=""
                android:layout_weight="0"/>
        </LinearLayout>
    </RelativeLayout>
</RelativeLayout>

これでわりといい感じに表示される

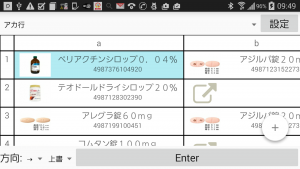
RelativeLayoutが良い感じになるコツ!

Screenshot_2016-08-16-09-49-30

いい感じ


CouchDBにacralyzerをインストール

信じられないほど疲れた。

でもできた。

必要なものCouchDBでそれは前回の

CentOS 6.5 x64にCouchDBをインストールする方法

でみて

※古いとSSLが対応してないから新しいErlangを入れようね

インストールが完了したら

# adduser --no-create-home couchdb
# chown -R couchdb:couchdb /usr/local/var/lib/couchdb /usr/local/var/log/couchdb /usr/local/var/run/couchdb
# ln -sf /usr/local/etc/rc.d/couchdb /etc/init.d/couchdb
# chkconfig --add couchdb
# chkconfig couchdb on

でユーザーを作ってあげて起動時に起動するように設定

あと外部からのアクセスできるように

vi /usr/local/etc/couchdb/local.ini

[httpd]
port = 5984
bind_address = 0.0.0.0

にしましょう


さて起動!

couchdb start

起動したと思ったら

http://your-ip-address:5984/_utils/

にアクセスすると開ける

んでcouchDBにacralyzerを入れる!

せつめいしょ:

Fill the form with the following:

You can use whatever name you want instead of ‘myapp’ but you MUST prefix it with acra-. This naming convention allows Acralyzer to discover all acra-storage instances available on your couchdb.

  • Click on Replicate and accept the creation of the new database.

Once again for the acralyzer couchapp:

がんばって読んでやる:)

2種類のdistrib-acralyzerdistrib-acra-storageのDBを作るからね!1つだけじゃないからね!

次:

DBできたから安心と思って

http://acme.yourhost.com/acralyzer/_design/acralyzer/index.html.

にアクセス!!

見れた!

あれ????

/usr/local/bin/couchjs: error while loading shared libraries: libmozjs185.so.1.0: cannot open shared object file: No such file or directory
[error] [<0.227.0>] OS Process Error <0.6614.0> :: {os_process_error,
{exit_status,127}}

が無限ループで進まない?????

原因:SpiderMonkeyが見つからないこと

LD_LIBRARY_PATH

を登録しましょう

You can add it in /etc/bashrc, say, at the end.

export PATH=$PATH:/usr/local/lib
export LD_LIBRARY_PATH=$LD_LIBRARY_PATH:/usr/local/lib

これで解決です。


さらにメモ

これで出来ないと思うけど連続の処理のコマンド

wget http://erlang.org/download/otp_src_R15B01.tar.gz
tar zxvf otp_src_R15B01.tar.gz
cd otp_src_R15B01
./configure && make && sudo make install
wget http://ftp.mozilla.org/pub/mozilla.org/js/mozjs17.0.0.tar.gz
tar -xvf mozjs17.0.0.tar.gz
cd mozjs17.0.0/js/src/
./configure
make && make install
wget http://mirror.tcpdiag.net/apache/couchdb/source/1.6.1/apache-couchdb-1.6.1.tar.gz
tar -xvf apache-couchdb-1.6.1.tar.gz
cd apache-couchdb-1.6.1
./configure
make && make install
adduser –no-create-home couchdb
chown -R couchdb:couchdb /usr/local/var/lib/couchdb /usr/local/var/log/couchdb /usr/local/var/run/couchdb
ln -sf /usr/local/etc/rc.d/couchdb /etc/init.d/couchdb
chkconfig –add couchdb
chkconfig couchdb on

CentOS 6.5 x64にCouchDBをインストールする方法

主に
https://www.digitalocean.com/community/tutorials/how-to-install-couchdb-from-source-on-a-centos-6-x64-vps
http://www.tecmint.com/install-apache-couchdb-in-rhel-centos-debian-and-ubuntu/
を参考にしてやった。
ほとんどコピペです。

Step 1 – ビルドツールをインストール

CouchDBをソースからコンパイルするときに必要なツールを入れる

とりあえず最新版に:

sudo yum -y update

次に Development Toolsを入れる:

sudo yum -y groupinstall "Development Tools"

CouchDBのコンパイルに必要なdependenciesもいれる: Erlang と SpiderMoney:

sudo yum -y install libicu-devel curl-devel ncurses-devel libtool libxslt fop java-1.6.0-openjdk java-1.6.0-openjdk-devel unixODBC unixODBC-devel openssl-devel

Step 2 – Erlangのインストール

Erlang は CouchDBにとって必要. だけどCentOSチームは公式パッケージを提供してない。ざんねん。だから自分でコンパイルしないとね。

最初に www.erlang.org/download.html にいって最新コードをダウンロード.

wget http://erlang.org/download/otp_src_19.0.tar.gz

ダウンロード完了したら,解凍する:

tar zxvf otp_src_19.0.tar.gz

解凍で来たら,コンパイルする:

cd otp_src_19.0
./configure && make

次にインストール.標準では, Erlangは /usr/local にあるよ:

sudo make install

Step 3 –  SpiderMonkey JS Engineのインストール

Mozilla’s SpiderMoney JavaScript Engine は 正常にCouchDB をコンパイルするために必要なんだよ.

CouchDB は Mozilla’s SpiderMoney version 1.8.5が必要,ここの FTPからダウンロードして:

wget http://ftp.mozilla.org/pub/mozilla.org/js/js-1.8.0-rc1.tar.gz

ダウンロード完了したら,解凍する:

tar -zxvf js-1.8.0-rc1.tar.gz

解凍で来たら,コンパイルする:

cd js-1.8.0-rc1/js/src
./configure && make
sudo make install

なんかうまくいかない場合はdirでディレクトリみてちゃんと解凍できてるか見よう

なんか

wget http://ftp.mozilla.org/pub/mozilla.org/js/js185-1.0.0.tar.gz
cd js-1.8.5/js/src     (なんかこれでいいかはdirで見る)
./configure && make
sudo make install

でうまくいけるかも

Step 4: CouchDBのインストール

最後にCouchDBのコンパイルしてインストール:

# wget http://mirror.tcpdiag.net/apache/couchdb/source/1.6.1/apache-couchdb-1.6.1.tar.gz
# tar -xvf apache-couchdb-1.6.1.tar.gz
# cd apache-couchdb-1.6.1
# ./configure
# make && make install

Apacheの表示がイントラ内だけ妙に遅い(応答性能が低い)症状

なんか不思議な現象が起きた。

Httpsで外部から開く場合はpingが遅くないのに社内だとpingがすごくおそい。

逆だったら普通なんだけど、なんかおかしい。

原因は.htaccessの逆引き処理でした。

order deny,allow
#deny from all
allow from 192.168.11.30
allow from localhost
allow from 127.0.0.1

order deny,allow
#deny from all
allow from 192.168.11.30
allow from 127.0.0.1

にしたら治った。

localhostをDNSで逆引きしちゃうとは・・・

¥の挙動

PHPでファイルパスを指定するとき¥を使うけど、

¥を二回¥¥とやっても¥が一回しかないよー的な動作をしたり2つある的な動作もする。

もしD:\\とか場合だと正規表現できちんと認識させるためには\\\\\\\\としないといけない

$dir=”D:\\test”

if(preg_match(‘{^(?:[a-zA-Z]\:(\\\\\\\\|\/\/\/\/))([^\\\/\:\*\?\<\>\”\|]+(\\\\\\\\|\/\/\/\/){0,1})+$}’, $dir, $m))

はOK

if(preg_match(‘{^(?:[a-zA-Z]\:(\\\\|\/\/))([^\\\/\:\*\?\<\>\”\|]+(\\\\|\/\/){0,1})+$}’, $dir, $m))

はNG